Table of Contents
- Directories
- Installation
- Theme Options
- Site Sections
- Setup Front Page
- Import Demo Content
- Create New Project
- Reorder Projects
- Primary Menu
- Contact Form 7
- WPBakery Update
- How to Translate
A) Directories
axen - Contains theme files.
help – Help file (HTML).
licensing – GPL descriptions.
source – Source files.
B) Installation
Current documentation was created to help you with quick installation and configuration of Axen theme. Please, read it carefully to avoid most of potential problems with incorrect configuration.
To install this theme you must have a working version of WordPress already installed.
For detailed Wordpress installation instructions visit https://codex.wordpress.org/Installing_WordPress
Download the zipped package from ThemeForest and extract to your desktop. In the extracted package you will find axen.zip file which is the WordPress theme.
You can install the theme in two ways:
- WordPress: Navigate to Appearance > Themes > Add New > Upload Theme page. Select axen.zip file. Press the Install Now button to upload and install the theme.
- FTP: Extract axen.zip file (Inside there's a folder, also named axen) and upload the extracted folder to /wp-content/themes/ folder on your server. Navigate to Appearance > Themes and activate Axen theme.
Once you have activated the theme you will need to change some of the pages and media settings for optimal performance.

After that, check required plugins on Appearance / Install Plugins:
- Axen Addons
- Envato Market
- One Click Demo Import
- Redux Framework
- WPBakery Page Builder
Then, import sample data automatically via Appearance / Import Demo Data.
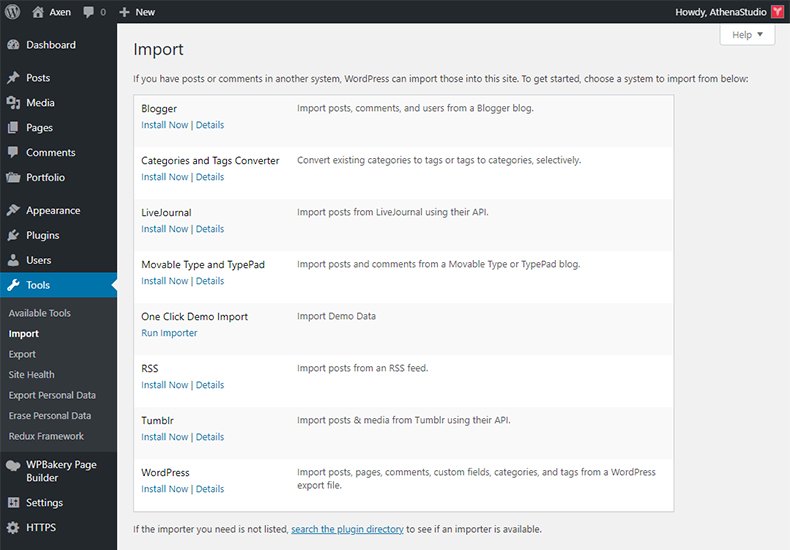
Or, import sample data manually (axen/demo/axen.wordpress.xml) at Tools / Import / WordPress (If not installed, press "Install Now"). Click on Run Importer. (You can load sample images by ticking the field in the opening page.)
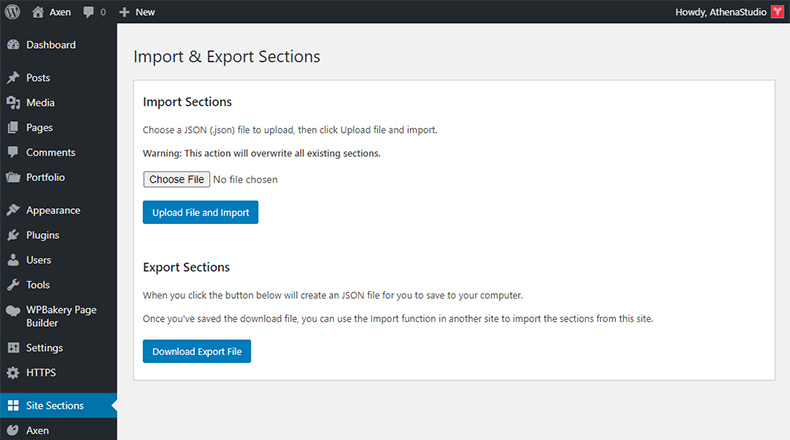
In 3rd step, if you imported the data manually, open Site Sections. Click on Import & Export Sections button. Select (axen/demo/axen.sections.json) to import.
In 4th step, go to Settings / Reading. Select "A static page (select below)" and select Front Page as Header Style - Image Slideshow.
Finally, go to Appearance / Menus. Click on Manage Locations and select Main Menu as Primary Menu.
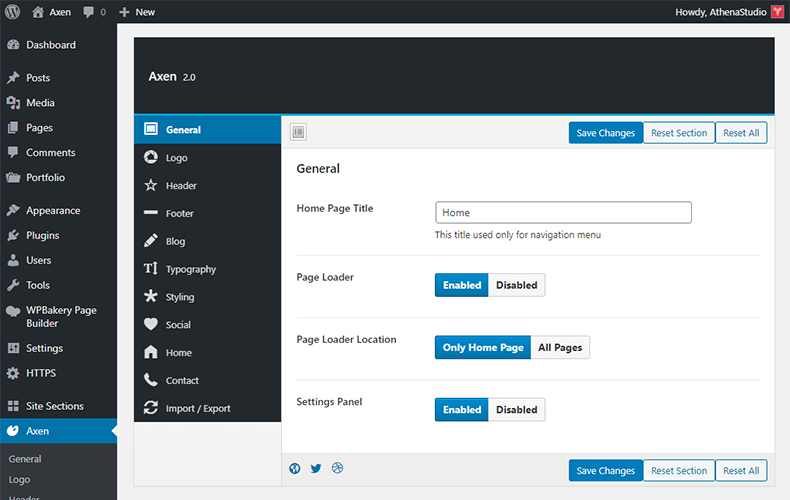
C) Theme Options
After the installation you can make your own settings. Please, open Axen (Theme Options) and make site-wide settings:
- Write Logo Text – Personalization tab
- Edit Contact Information – Contact Section tab
- Enter Copyrights – Footer Options tab
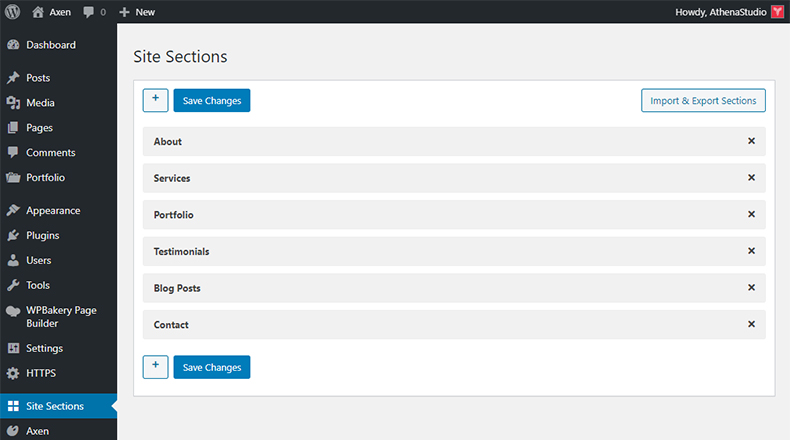
D) Site Sections
The template uses sections to generate front page. Go to Site Sections you will see a panel where you can create new sections.
Create a few, select needed types and fill required data. Drag-and-drop feature allows to sort sections.
After editing, click Save Sections.
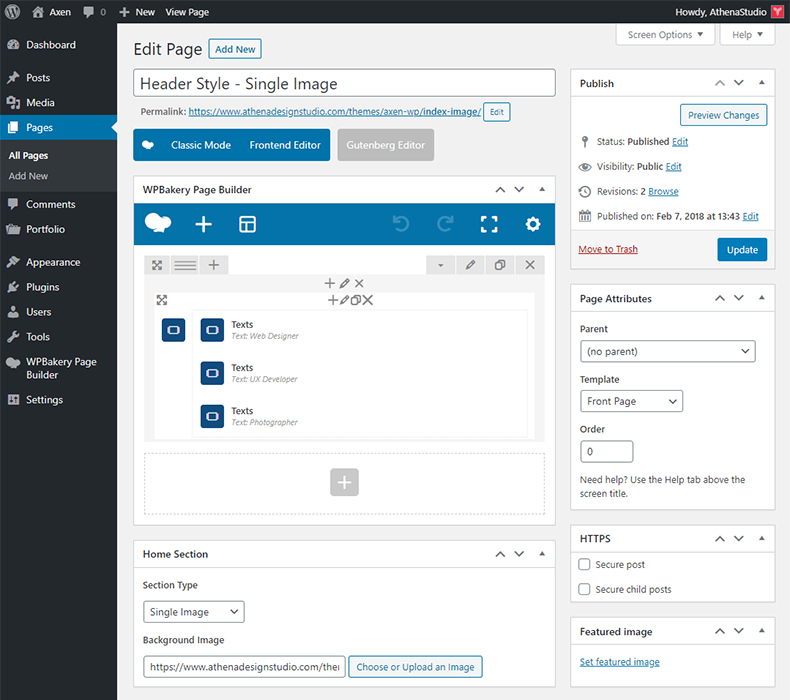
E) Setup Front Page
Create a new page Pages > Add New based on the Front Page template, then click on the Publish.
Once page will be reloaded, you need to select the Section Type and enter some data.
Then click on the Update for saving changes.
Go to Settings > Reading and set the new page as front page.
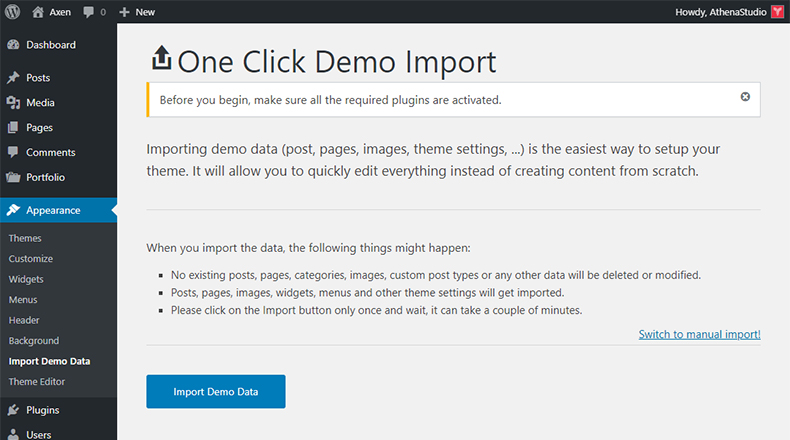
F) Import Demo Content
If you want to have the same website as Live Preview of theme, you’ll need to import demo content.
There're 2 ways to import demo data:
1. One Click Demo Import
- Go to Appearance > Import Demo Data
- Click on Import Demo Data
2. Import Demo Data Manually
- Go to Tools > Import > WordPress
- Install the plugin offered and you will see a file form
- Upload the axen/demo/axen.wordpress.xml file
Import/Export Sections
- Go to Site Sections > Import & Export Sections
- Choose the axen/demo/axen.sections.json file to upload, then click Upload File and Import
G) Create New Project
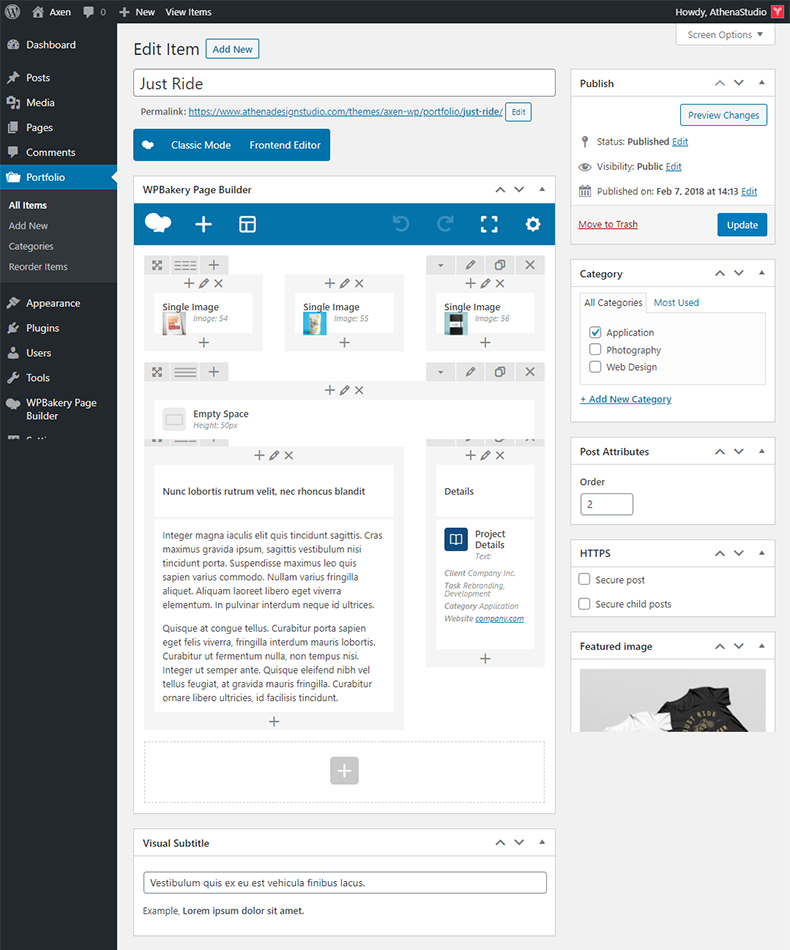
Creating project is nothing new if you have even basic experience with WordPress and is similar to posts. You can create portfolio project which will your images or video clip. Fill the content and don’t forget to set Featured Image.
H) Reorder Projects
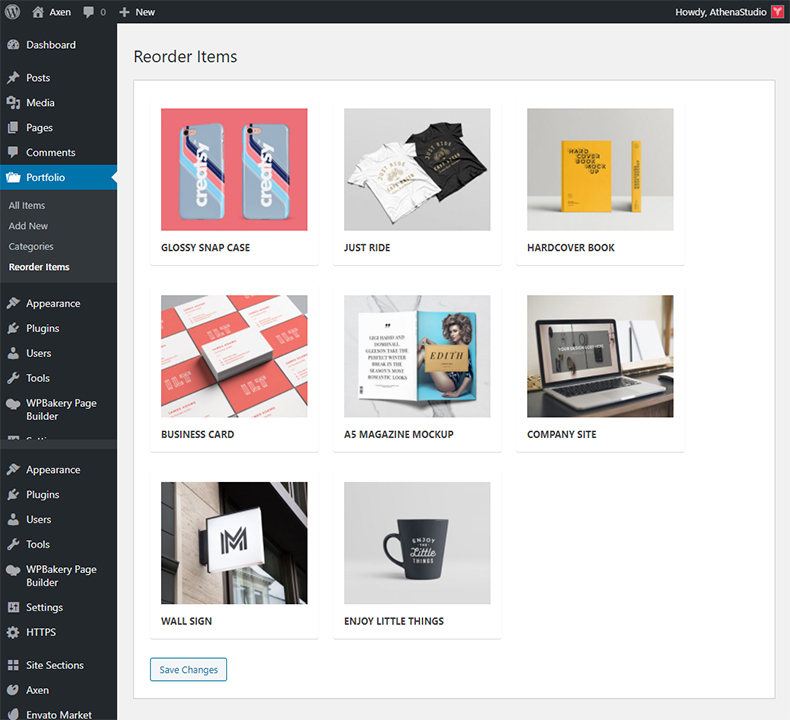
To move a Project, place the cursor over the block. Depending on your browser, the cursor will change to show a Hand or a Move icon. Drag and drop the block on top of another block to place it above that block.
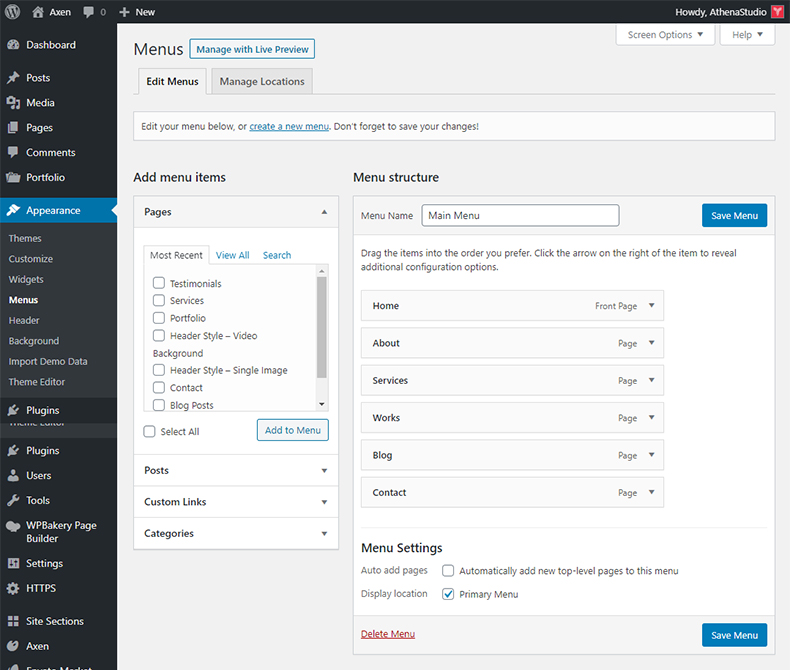
I) Primary Menu
Axen supports custom WordPress menu. Navigate to WP Admin Appearance > Menus page and create menu. Select the newly created menu from the theme locations dropdown box Main Navigation as it mentioned on screenshot and press Save button.
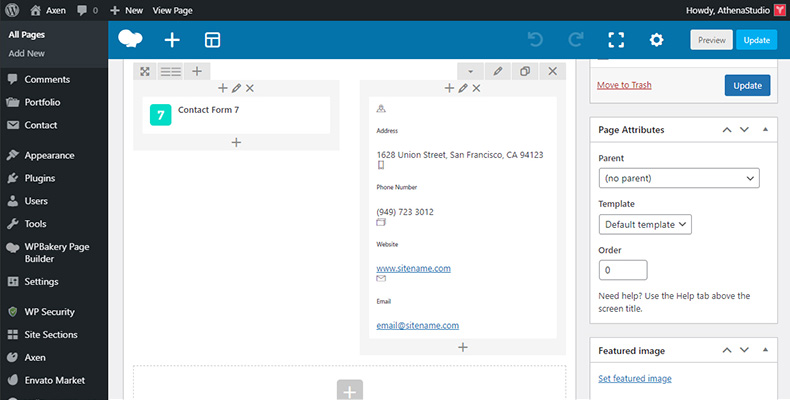
J) Contact Form 7
Open Contact > Contact Forms. Edit the 1st contact form. Copy following HTML code to Form field.
<div class="form-group"> [text* your-name class:form-control placeholder "Name"] </div> <div class="form-group"> [email* your-email class:form-control placeholder "Email"] </div> <div class="form-group"> [text* your-subject class:form-control placeholder "Subject"] </div> <div class="form-group"> [textarea your-message class:form-control placeholder "Message"] </div> <p> [submit class:btn class:submit class:btn " Send Message"] </p>
Then, edit Contact page. Remove if there's old shortcode of contact form and add Contact Form 7 shortcode by clicking on + button.
K) WPBakery Page Builder Update
After downloading the new axen.zip installation file, remove WPBakery Page Builder plugin. Then, reinstall it via Plugins / Add New. WPBakery plugin installation file is in axen/plugins/js_composer.zip.
Or, update Axen theme via Envato Market plugin. Then, remove WPBakery Page Builder plugin. You’ll see WPBakery installation request in WP admin panel.
L) How to Translate
The translation file you can find in languages folder (/wp-content/themes/axen/languages). Edit the .po file using POEdit, use the translation field to make replacements. Read here how to do it right.
From the file menu, save file with your language name e.g de_DE.po into languages folder. It will generate both a *.po and *.mo file for your translation.
Next edit wp-config.php located in the root folder of wordpress and define the WPLANG prefix with your language name which should be similar to the translation file name.